Autopilot Relay Setup
-
In BlueOS, configure a relay pin in the autopilot parameters by
- setting
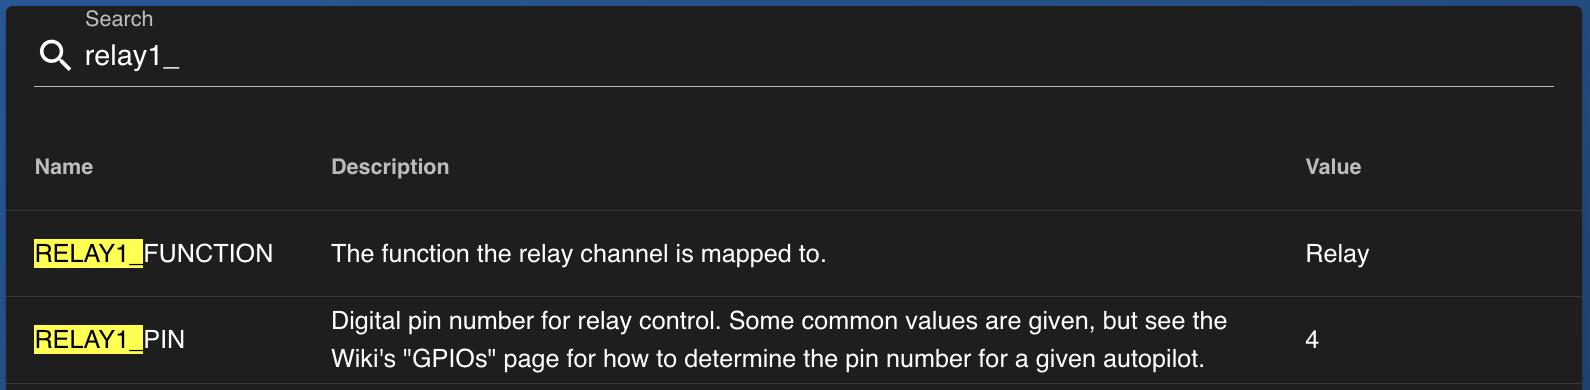
RELAY1_FUNCTIONtoRelay (1) - setting
SERVO4_FUNCTIONtoGPIO (-1)- or whichever pin you want to use
- can also be set through the Vehicle Setup / PWM Outputs page in BlueOS
- rebooting the autopilot
- required if the relay function was previously set to
None, so it can load the relevant configuration options
- required if the relay function was previously set to
- setting
RELAY1_PINto 4- must match the
SERVOn_FUNCTIONn value
- must match the
- setting

Basic Relay ON/OFF Control
-
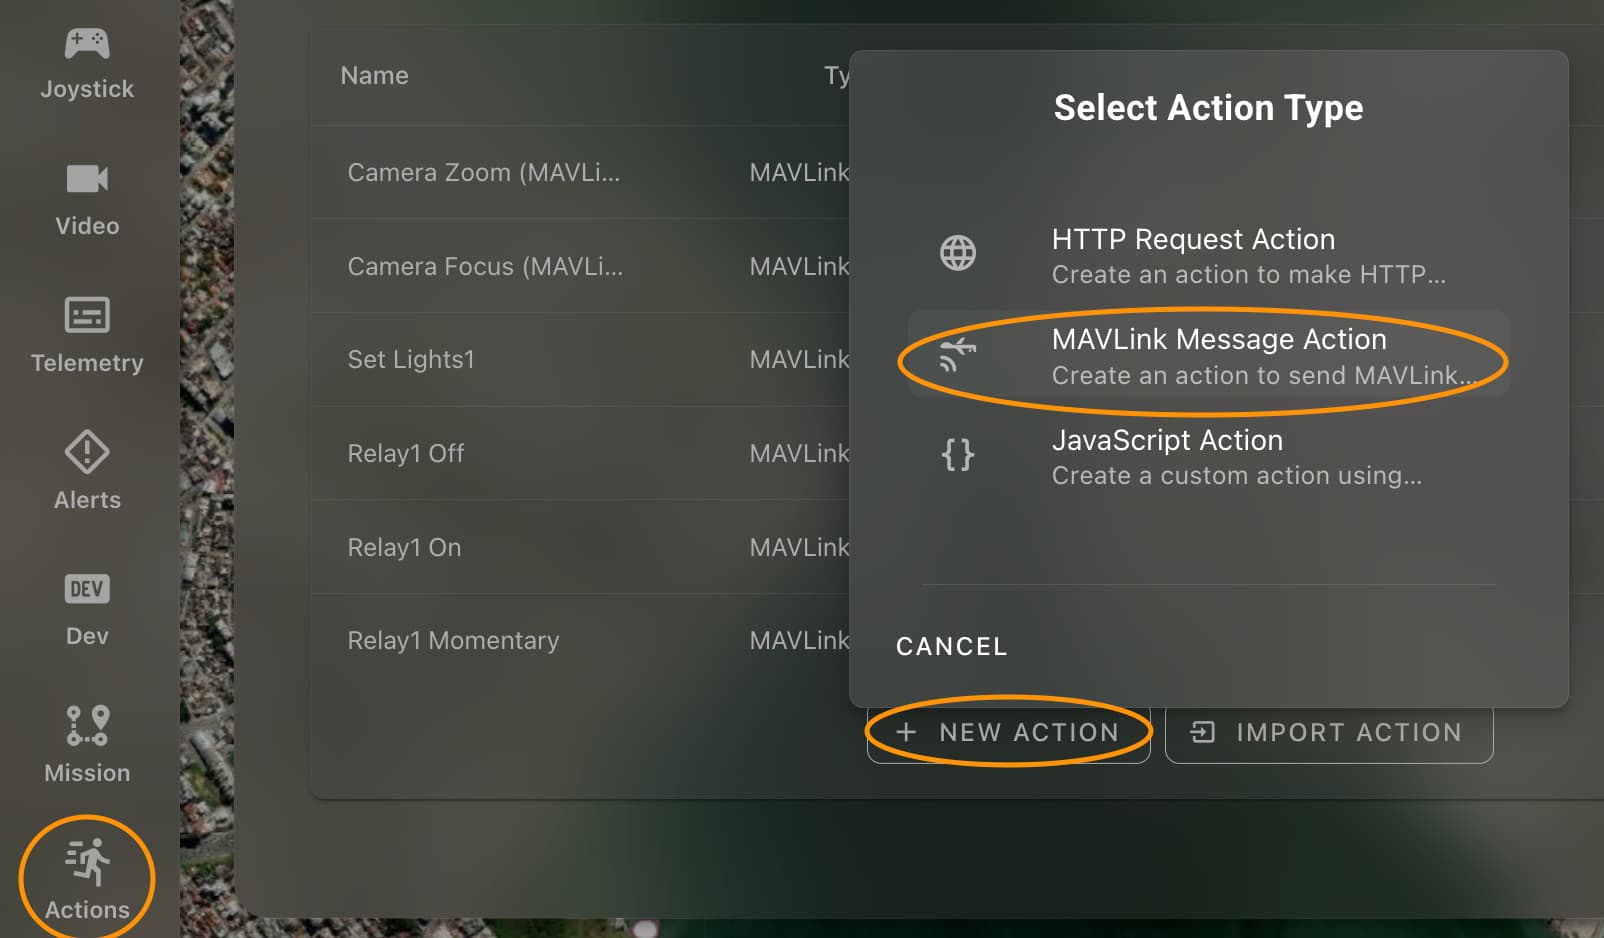
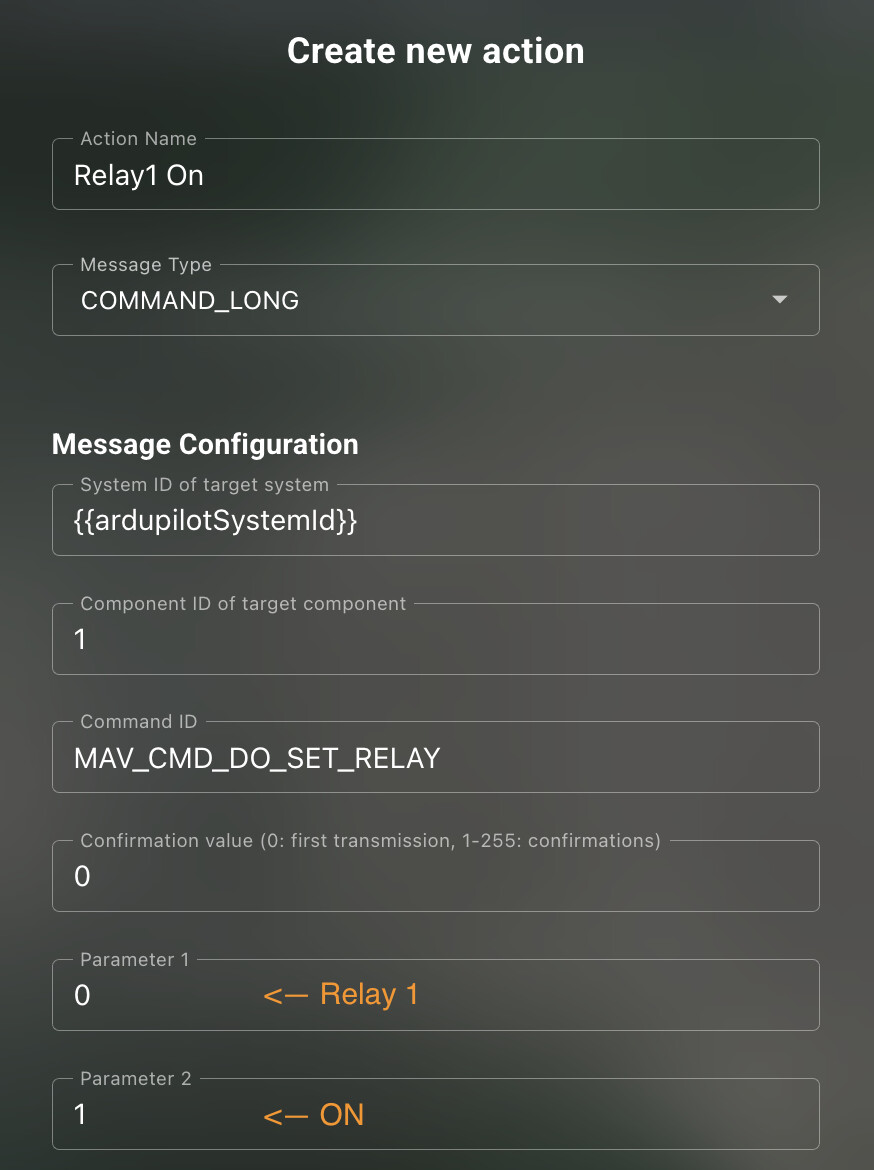
Go to
Settings / Actionsand set up two separate custom MAVLink message Actions, for on and offMAV_CMD_DO_SET_RELAYcommands (using theCOMMAND_LONGmessage type)- Relays in MAVLink are 0-indexed, so Relay 1 is controlled by 0 in parameter 1
- The desired state is in parameter 2, and should be 0 for off, and 1 for on
-
Test the Actions
- You can press the play buttons in the Actions menu
- It may be helpful to set up a plotter widget, with
SERVO_OUTPUT_RAW/servo4_raw(or whichever pin you’re using) to see the relay state in real time, especially if you don’t have hardware connected to it - If the Actions aren’t working as expected, you may need to edit them to make sure the parameters are set correctly
-
Connect the Actions to your interface(s) of choice
- On-screen buttons can be added through Edit Mode
- They can be mapped as joystick button functions
- On-screen buttons can be added through Edit Mode


Relay Toggle Control
-
Go to
Tools / Data-Lakevia the sidebar menu, and create a new compound variable (top right, “Add compound variable”) to invert the reported pin output- 0 and 1 can be inverted with an exclusive-OR (xor:
^) operation with 1 - MAVLink commands only accept numerical values, so we need the Number type (not boolean)
- 0 and 1 can be inverted with an exclusive-OR (xor:
-
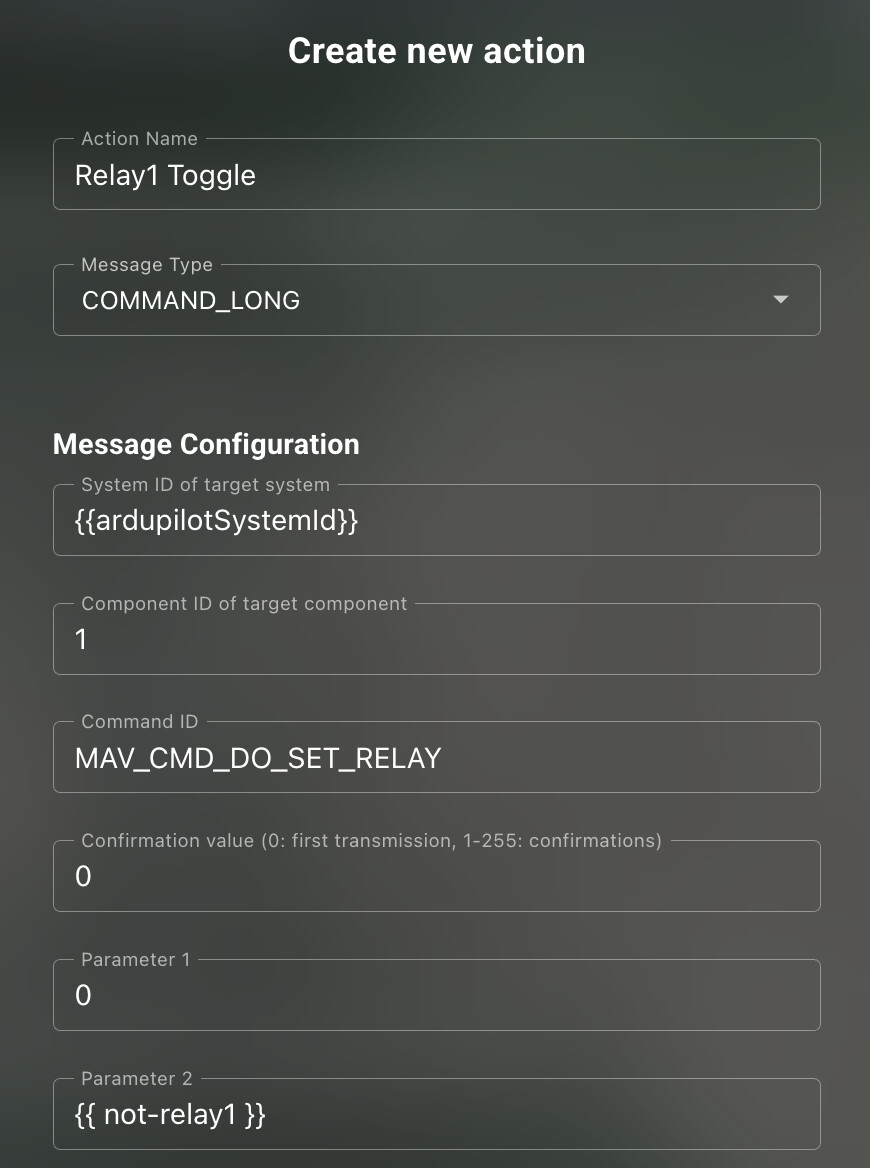
Create a new
DO_SET_RELAYcustom MAVLink Action (like in the ON/OFF Control section), but this time set parameter 2 using the new compound variable, so it always inverts the currently reported value
-
Test the Action, and connect it to interfaces as detailed above.

Momentary Relay Control
Momentary control is currently only possible with joystick buttons, not on-screen ones.
-
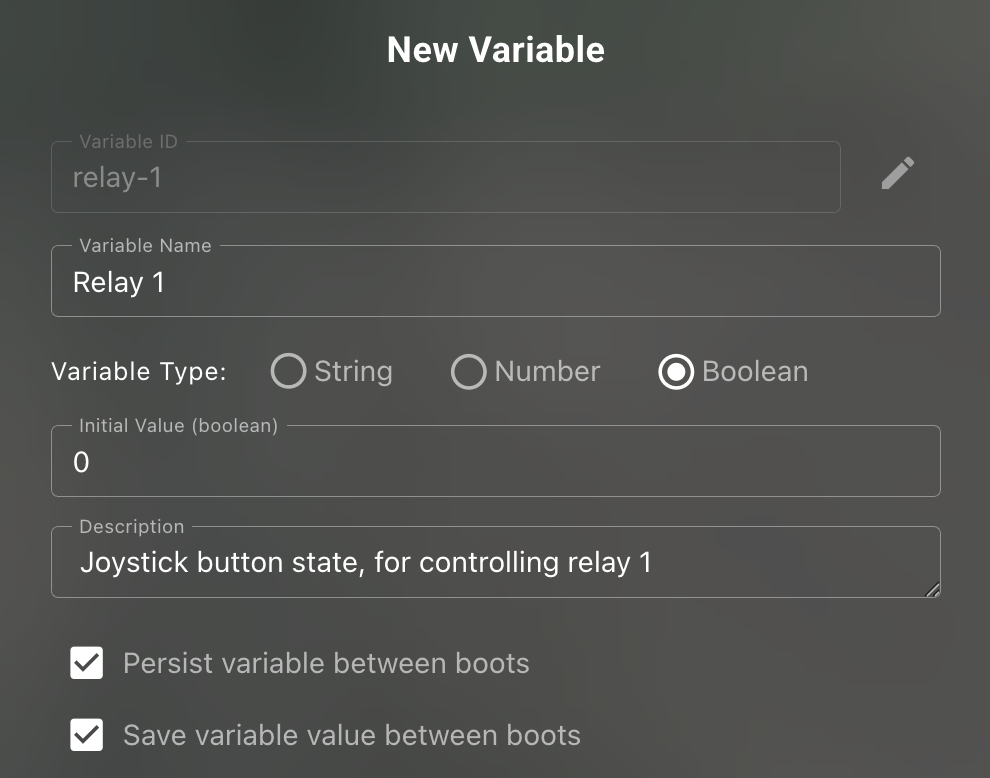
Go to
Tools / Data-Lakeand add a new variable, to represent the joystick button state- Buttons are boolean
- Set the initial value to 0, because buttons normally start un-pressed
-
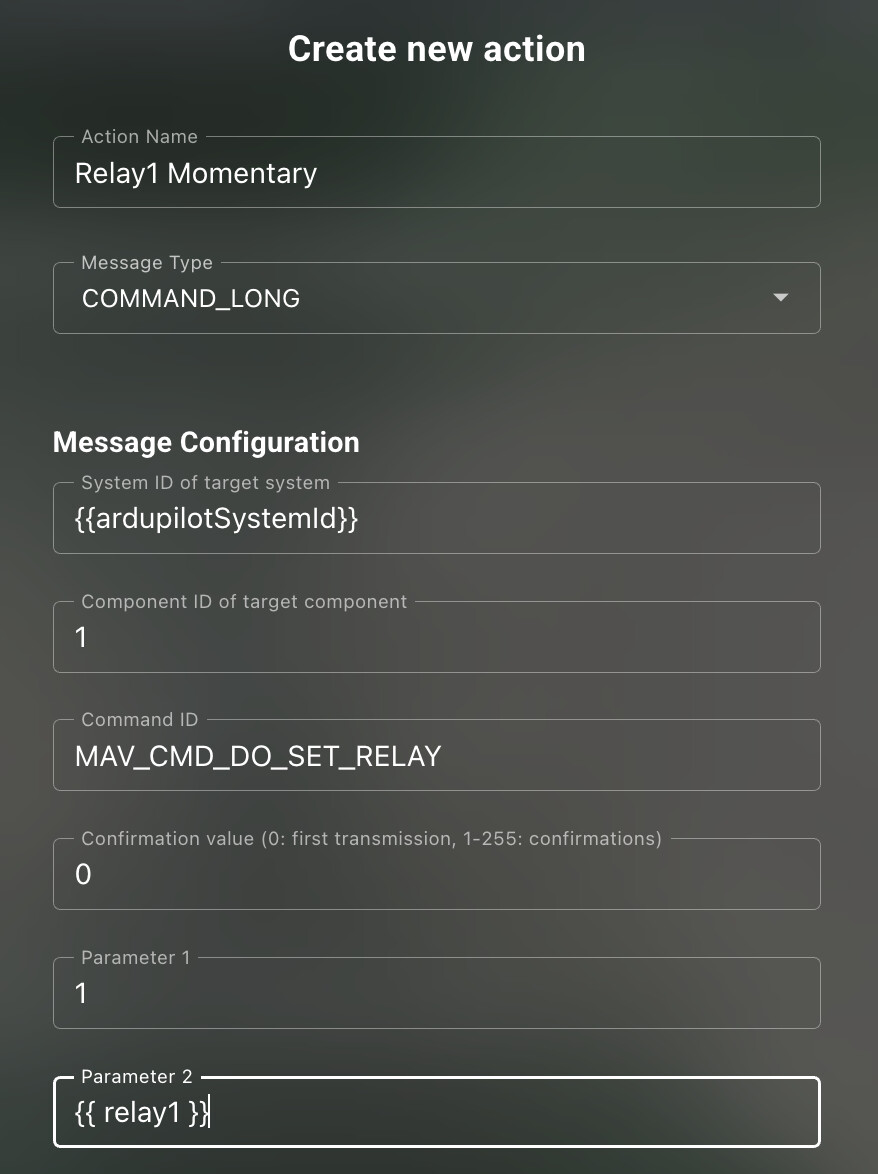
Go to
Settings / Actionsand create a new custom MAVLink Action, using your variable as the output value
-
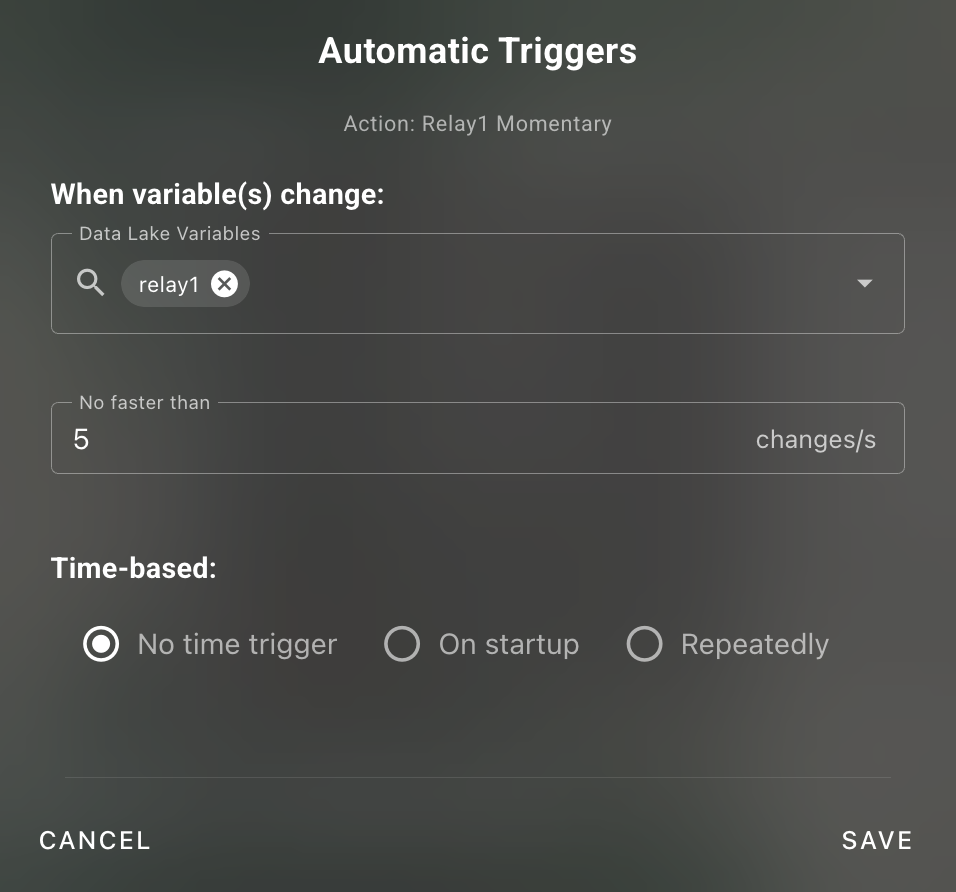
Add a link to the Action, so it triggers automatically when the variable value changes
-
Go to
Settings / Joystickand connect a joystick button to control your data-lake variable
-
Confirm the functionality is working as expected

Momentary PWM toggling
-
In BlueOS, configure the relevant
SERVOn_FUNCTIONtoDisabled (0), so it can be used for custom functionality- I’ll assume this was done with n=5 (for controlling pin 5)
-
In Cockpit, go to
Tools / Data-Lakeand add a new variable, to represent the joystick button state
-
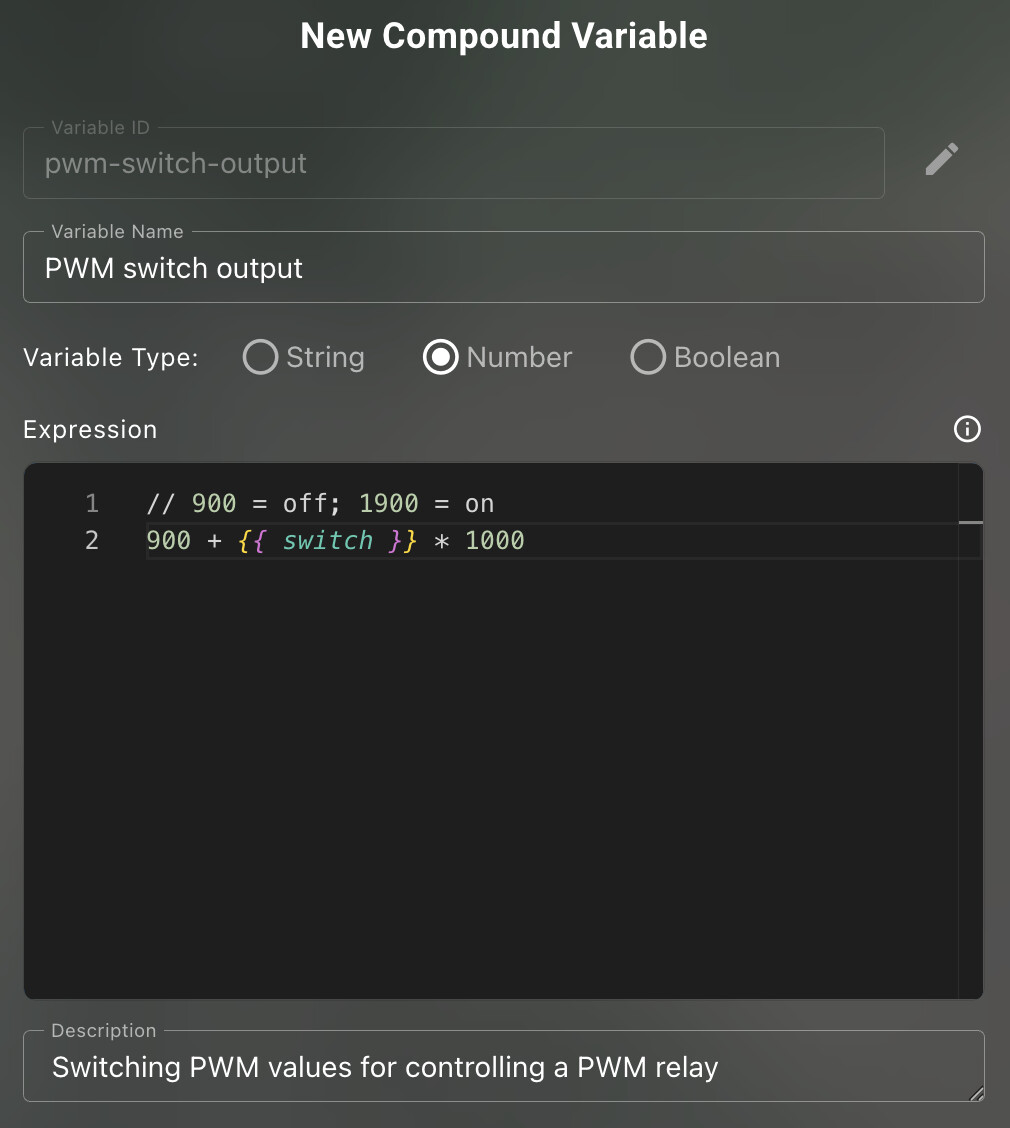
Now add a compound variable, to convert the joystick button state to the desired PWM values
-
Copy (or remember) the variable ID

-
Go to
Settings / Actionsand add a custom MAVLink message action, using theMAV_CMD_DO_SET_SERVOcommand- Specify the output channel you want to control (e.g. 5 for pin 5)
- Use the compound variable for the commanded value
-
Set up an automated trigger for the Action when the variable changes value
-
Go to
Settings / Joystickand map a button function to control the base variable
-
Close the joystick configurator, and test to make sure the functionality works as intended
- It may help to set up a plotter widget, with
SERVO_OUTPUT_RAW/servo5_raw(or whichever pin you’re using) to see the PWM state in real time, especially if you don’t have hardware connected to it
- It may help to set up a plotter widget, with