Fathom X wireless topside

Has anyone looked at an option for going wireless wifi from the Fathom X to computer on surface end?

Would be nice to break all physical ties at top side setup and allow for easier cable management if all could be mounted to a reel with no slip ring needed.

1 Like

As per this approach basically:

Open ROV Wireless Tether Setup

Then the entire system could be mounted in the middle of a tether reel, no slip rings needed.

Yup, weā€™re essentially using similar tech to OpenROV so Iā€™d think it would work. Would also make using a reel easier as it wouldnā€™t need a slipring. And make designing a reel for my 200m tether much easier. My concern would be how reliable the connection is and would bandwidth be limited in any way. Any break in the comms with the ROV could potentially cause all sorts of issues.

All you would need is a router. The approach would be the same as connecting to a raspberry pi that is connected to your home network router.

-Jacob

I tried this out today, and can confirm it works with just a router, and some changes to the piā€™s network configuration. I will make a tutorial when I get a chance.

-Jacob

Paulā€™s concerns are valid and should be taken into consideration when opting for this setup. A hardwired connection would certainly be more reliable; until you trip over the wire and yank it out. That said, there is a failsafe in place in case communications with the GCS are lost.

-Jacob

@Jacob - A tutorial would be awesome. :slight_smile:

Hello everyone!

I got all the necessary items to try Open ROV Wireless Tether Setup. I been trying different configurations, but I havenā€™t been able to connect to the BlueROV2.

Any suggestions? Guidance? Spells?

Thanks in advance.

I picked up a wireless portable Access Point as well but not yet had a chance to try setting it up.

Briefly, this is how I set it up with a TP Link WR802N router. The steps may vary for different routers and operating systems, and a familiarity with linux and networking will be required for different setups and troubleshooting.

The raspberry pi ethernet interface needs to be configured for dhcp. This is the default configuration on a raspbian jessie install. If you have a raspberry pi image configured for ardusub already, you will need to delete the ā€˜ip=192.168.2.2ā€™ line from /boot/cmdline.txt that is described here.

Confirm that the raspberry pi is configured for dhcp and doesnt have a static ip address by looking at /etc/network/interfaces and make sure it looks like this:

pi@raspberrypi:~ $ cat /etc/network/interfaces

interfaces(5) file used by ifup(8) and ifdown(8)

Please note that this file is written to be used with dhcpcd

For static IP, consult /etc/dhcpcd.conf and ā€˜man dhcpcd.confā€™

Include files from /etc/network/interfaces.d:

source-directory /etc/network/interfaces.d

auto lo
iface lo inet loopback

iface eth0 inet manual

allow-hotplug wlan0
iface wlan0 inet manual
wpa-conf /etc/wpa_supplicant/wpa_supplicant.conf

allow-hotplug wlan1
iface wlan1 inet manual
wpa-conf /etc/wpa_supplicant/wpa_supplicant.conf

Ā 

You will need to get the hardware mac address of the ethernet interface of the raspberry pi. Type ā€˜ifconfig eth0ā€™ in a terminal on the pi, the hardware address will be listed in the output.

pi@raspberrypi:~ $ ifconfig eth0
eth0 Link encap:Ethernet HWaddr b8:27:eb:34:ff:9d
inet addr:192.168.0.20 Bcast:192.168.0.255 Mask:255.255.255.0
inet6 addr: fe80::bd2e:7045:3cd6:b30/64 Scope:Link
UP BROADCAST RUNNING MULTICAST MTU:1500 Metric:1
RX packets:20765 errors:0 dropped:11 overruns:0 frame:0
TX packets:11819978 errors:0 dropped:0 overruns:0 carrier:0
collisions:0 txqueuelen:1000
RX bytes:6763462 (6.4 MiB) TX bytes:3077012574 (2.8 GiB)

Ā 

Ā 

Next, sign into the router by connecting to itā€™s wireless network, and typing 192.168.0.1 in a browser address bar. Configure the router operation mode for ā€˜access pointā€™.

You will need to sign back in to the router at 192.168.0.254 now.

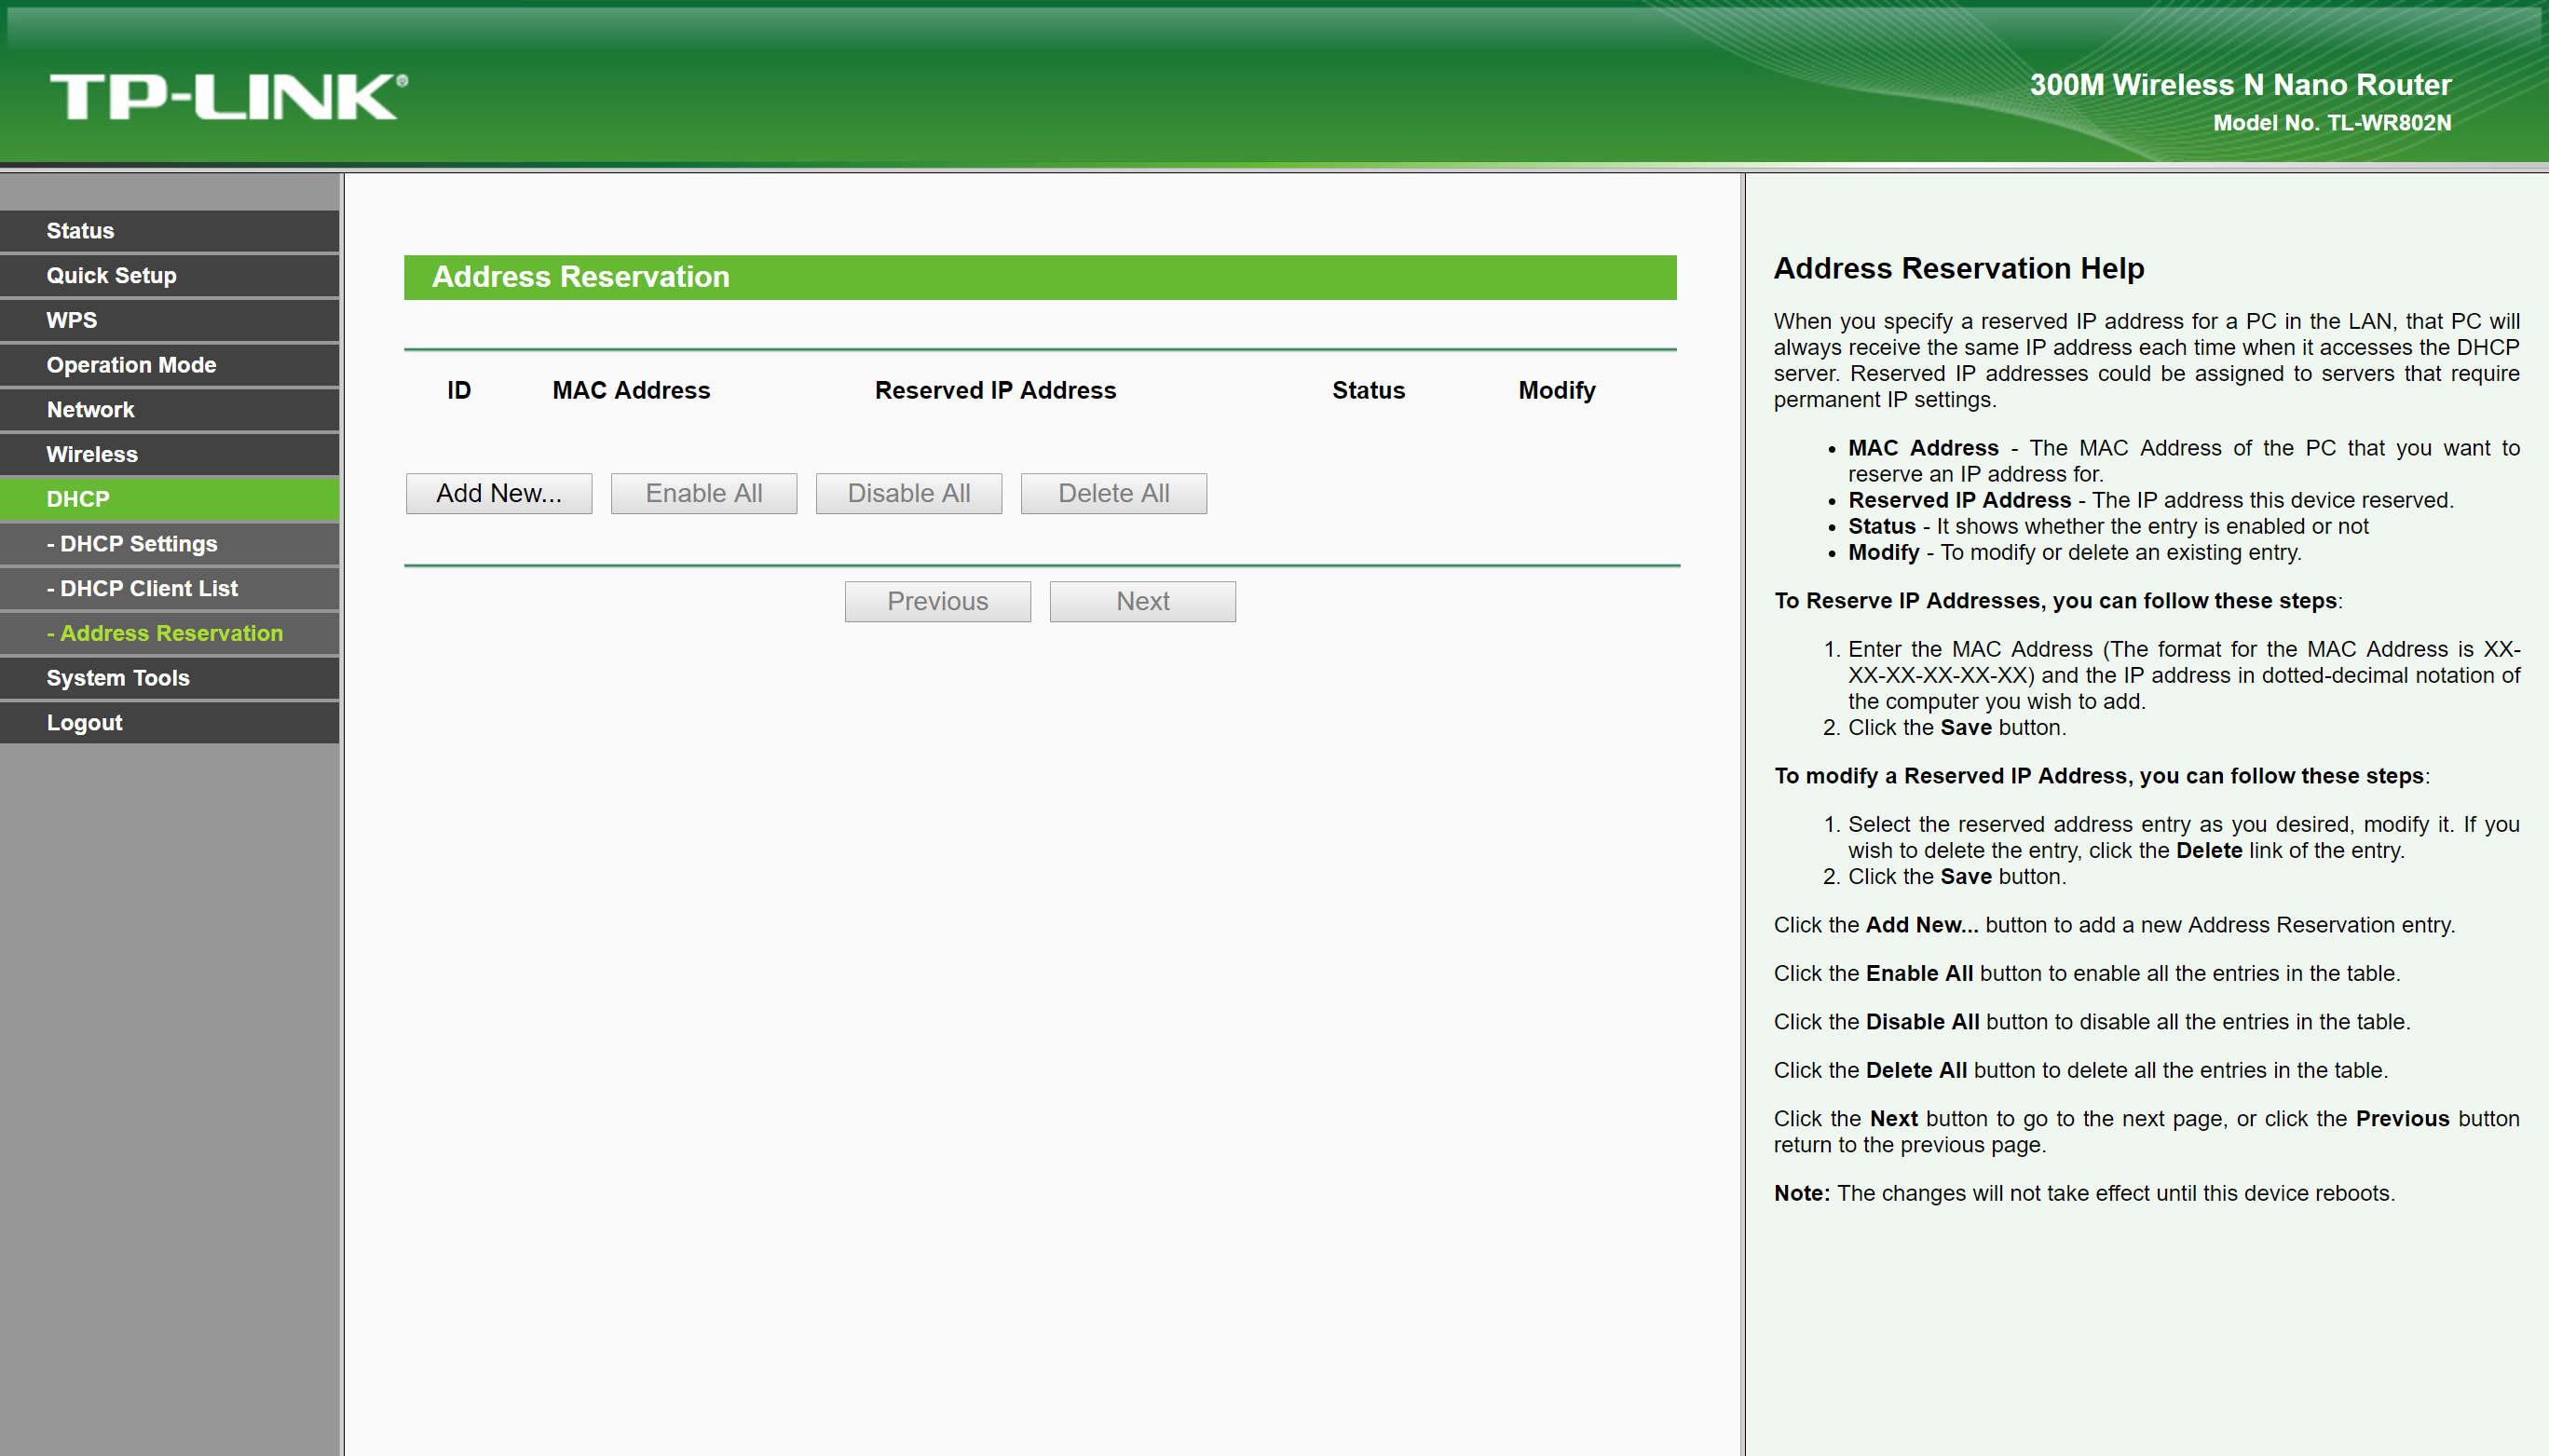
Configure the router to assign specific dhcp ip addresses for your raspberry pi and your computer.

For the raspberry pi, use the mac address obtained above, and whatever ip you want. For your computer, you will need to get the mac address of the wifi interface, and do the same thing.

If you used different ip addresses than were previously configured for the direct wired connection, you will need to change the addresses in the mavproxy and video launch scripts.

Now you connect to the raspberry pi wirelessly by signing in to the routerā€™s wireless network from your computer.

After configuring for this setup, a direct wired ethernet connection will no longer work.

Ā 

-Jacob

Ā 

Ā 

Ā 

@Jacob - Thanks for the information! Iā€™m tempted to give this a try. How ā€œreliableā€ would you say using WiFi and that router is? If my laptop is within 10 meters of the router, might I have issues / interuptions?

Ā 

Hi,

Just a question, the IP address on Raspberry should absolutly be 192.168.2.2 or can we change it by our own local address (ie : 192.168.6.1 in order to test it in my network environnement) and thatā€™s set?

If we canā€™t change this address, the only way is to do like OpenRov wireless?

Thanks a lot

Antoine

@antoine,

When I setup my TP-Link wireless router to work with the OROV 2.8 Controller Board, I let it assign the onboard BBB an IP and MAC address and then made that IP permanent (static) in the wireless routerā€™s DHCP Table for the BBB using the MAC address. This solution works fine and is repeatable every time I connect to the Controller Board wirelessly.

Also, I found that I had to be at least a foot away from the TP-Link wireless router or I began to have connections issues if I was closer. The wireless link worked well out beyond 10 feet which is alright with me

Regards,

TCIII AVD

And Iā€™m reviving this old thread because I would rather use the BR Companion than ArduPilotā€™s APSync (you canā€™t plug in a USB camera, only a Pi-Cam). I am using the same TP-Link WR802N router that everyone else seems to have.

Ok, so Iā€™ve been following Jacobā€™s instructions and I have the following down:

  1. Deleted the ā€˜ip=192.168.2.2ā€™ line from /boot/cmdline.txt on the Pi.
  2. Confirmed the Pi is configured for dhcp.
  3. Obtained the hardware mac address of the Pi.
  4. Configured the router for ā€˜access pointā€™.
  5. I am able to sign back at 192.168.0.254.

From hereā€¦Iā€™m not quite sure where to go. Am I configuring the router to assign specific dhcp ip addresses from the ā€œAddress Reservationā€ menu?

Hereā€™s what my dhcp screens look like:

I used the same TP, configured without changing anything in the Raspberry, but my video was lacking, so I stopped using it.

I set up the router with static ip.

Kevin, sorry I missed this!

So these instructions were done before we set everything up around the 192.168.2 subnet. So the first thing we need to do is to change the subnet of the router. You can do that from the ā€˜Wirelessā€™ settings. Give the router a static ip of 192.168.2.3.

Then, you need to go into the address reservation page and add the mac addresses of the pi and the computer, and give them the addresses 192.168.2.2 and 192.168.2.1, respectively.

Let me know how it goes. If you end up not getting where you want very quickly I can update the instructions from beginning to end.

Thanks for the follow-up Jacob! I gave the router a static IP of 192.168.2.3, but I am unable to sign back into the router at that address to continue with the address reservation steps.

You can get back into it at 192.168.2.3.

Maybe not. Let me reset everything and try again.

make sure on your windows machine you have it set up for dhcp client on the ethernet interface.